Deploy a Spring Batch application by Using Data Flow
In this section, we demonstrate how to register a Spring Batch application with Data Flow, create a task definition, and launch the task definition on Cloud Foundry, Kubernetes, and your local machine.
Prerequisites
Before you start on this sample, you need to:
- Install Spring Cloud Data Flow.
- Install the Spring Cloud Task project that we use in this project.
Data Flow Installation
You must you have installed Spring Cloud Data Flow to one of the following platforms:
Spring Batch Project
For this guide, we use the Spring Batch Jobs sample Spring Batch application, called billrun.
Follow the instructions to code and build the Spring Batch application, if you have not done so already.
Create Task Definition
We register the batch application, create a simple task definition for the batch application, and launch the task definition by using the Data Flow Server. The Data Flow server provides a comprehensive API to perform the necessary steps. The Data Flow server includes a Data Flow Dashboard web UI client. In addition, you can use a Data Flow Shell command line interface (CLI), which is available as a separate download. The CLI and the UI both expose the complete API functionality. Which one to use is a matter of preference, but the UI is nice, so we feature it here.
The Data Flow Dashboard
Assuming Data Flow is installed and running on one of the supported platforms, open your browser at <data-flow-url>/dashboard. Here, <data-flow-url> depends on the platform. See the installation guide to determining the base URL for your installation. If Data Flow is running on your local machine, go to http://localhost:9393/dashboard.
Application Registration
The Data Flow Dashboard lands on the Application Registration view, where we can register the sample Spring Batch app. The following image shows the Application Registration view:

Application Registration Concepts
Applications in Data Flow are registered as named resources so that they can be referenced when you use the Data Flow DSL to configure and compose tasks.
Registration associates a logical application name and type with a physical resource, which is given by a URI.
The URI conforms to a schema and may represent a Maven artifact, a Docker image, or an actual http(s) or file URL.
Data Flow defines some logical application types, which indicate its role as a streaming component, a task, or a standalone application.
In this case, our Spring Batch application is registered as a task type.
For a Spring Batch Application to be launched by Data Flow, it must also be a Spring Cloud Task application. This is done by adding the @EnableTask to a configuration class or to the application as shown in our sample.
Registering an Application
Spring Cloud Data Flow supports Maven, HTTP, file, and Docker resources for local deployments. For this example, we use the Maven resource.
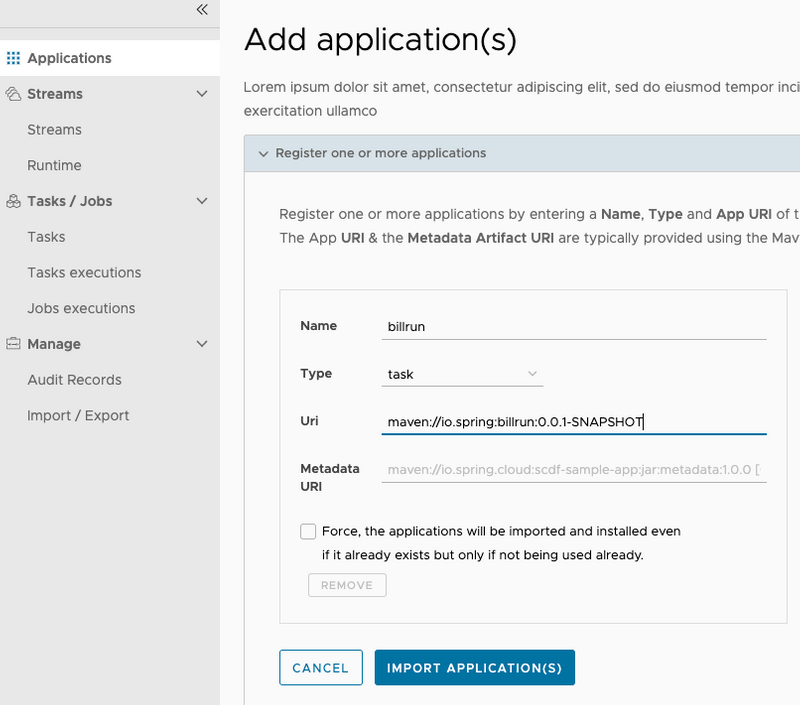
The URI for a Maven artifact is generally of the form maven://<groupId>:<artifactId>:<version>. The Maven URI for the sample application is as follows:
maven://io.spring:billrun:0.0.1-SNAPSHOTThe maven: protocol specifies a Maven artifact, which is resolved by using the remote and local Maven repositories configured for the Data Flow Server.
To register an application, select ADD APPLICATION(S). Once the Add Application(s) page appears select Register one or more applications. Fill in the form and click IMPORT APPLICATION(S), as follows:
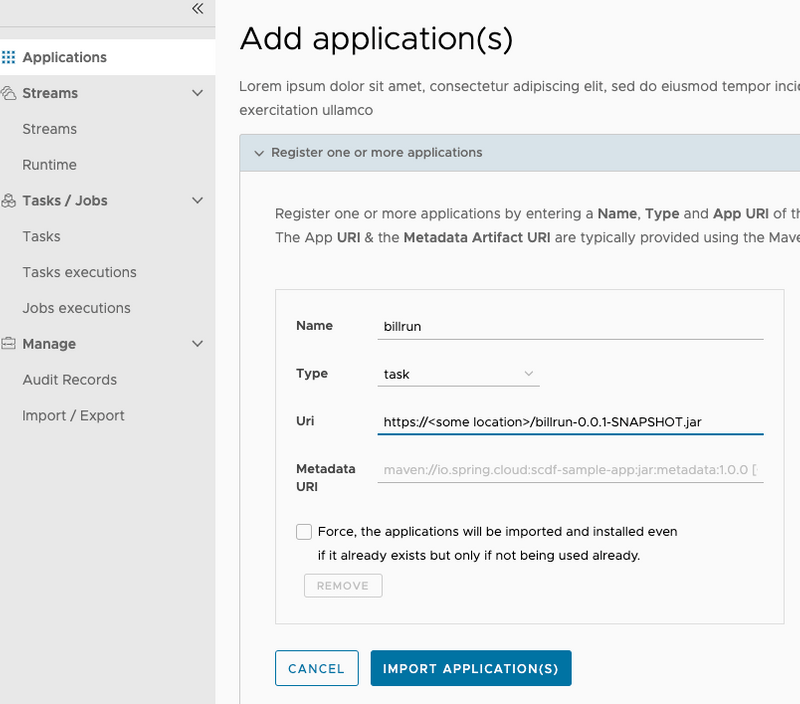
Spring Cloud Data Flow supports Maven, HTTP, and Docker resources for local deployments. For this example, we use an HTTP (HTTPS, actually) resource. The URI for an HTTPS resource is of the form https://<web-path>/<artifactName>-<version>.jar. Spring Cloud Data Flow then pulls the artifact from the HTTPS URI.
The HTTPS URI for the sample app is as follows:
maven://io.spring:billrun:0.0.1-SNAPSHOTTo register an application, select ADD APPLICATION(S). Once the Add Application(s) page appears select Register one or more applications. Fill in the form and click IMPORT APPLICATION(S), as follows:
Spring Cloud Data Flow supports Docker resources for Kubernetes deployments.
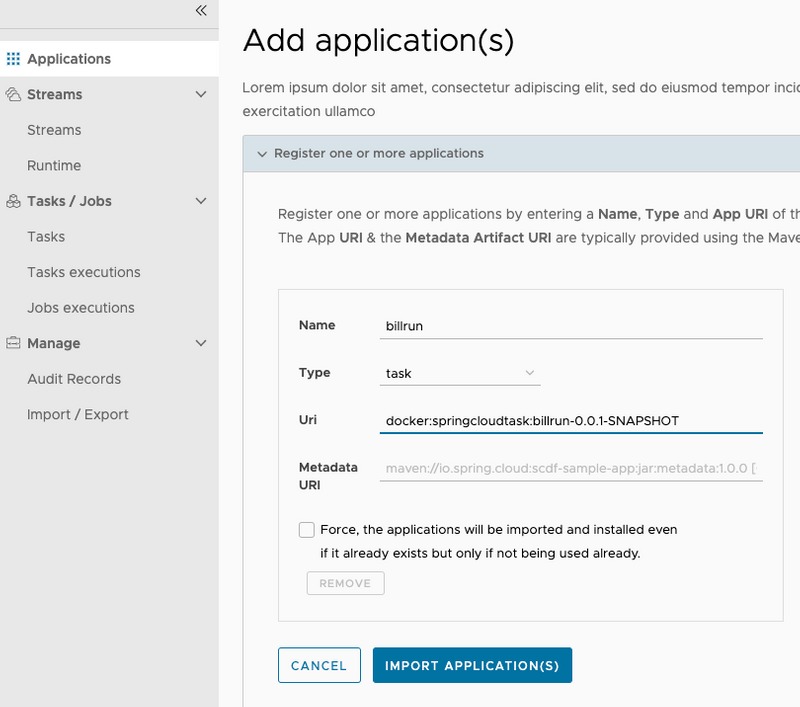
The URI for a Docker image is of the form docker:<docker-image-path>/<imageName>:<version> and is resolved by using the Docker registry configured for the Data Flow task platform and image pull policy.
The Docker URI for the sample app is as follows:
docker:springcloudtask/billrun:0.0.1-SNAPSHOTTo register an application, select ADD APPLICATION(S). Once the Add Application(s) page appears select Register one or more applications. Fill in the form and click IMPORT APPLICATION(S), as follows:
Creating the Task Definition
To create the task definition:
- Select Tasks from the left navigation bar.
- Select CREATE TASK.
Doing so displays a graphical editor that we can use to compose tasks.
The initial canvas contains
STARTandENDnodes. To the left of the canvas, we see the available task applications, includingbillrun, which we just registered. - Drag that task (
billrun) to the canvas and connect the task to the START and END nodes to complete the task definition. In this case, the task definition consists of a single task application. If the app defined configuration properties, we would set them here. The following image shows the UI for creating a task: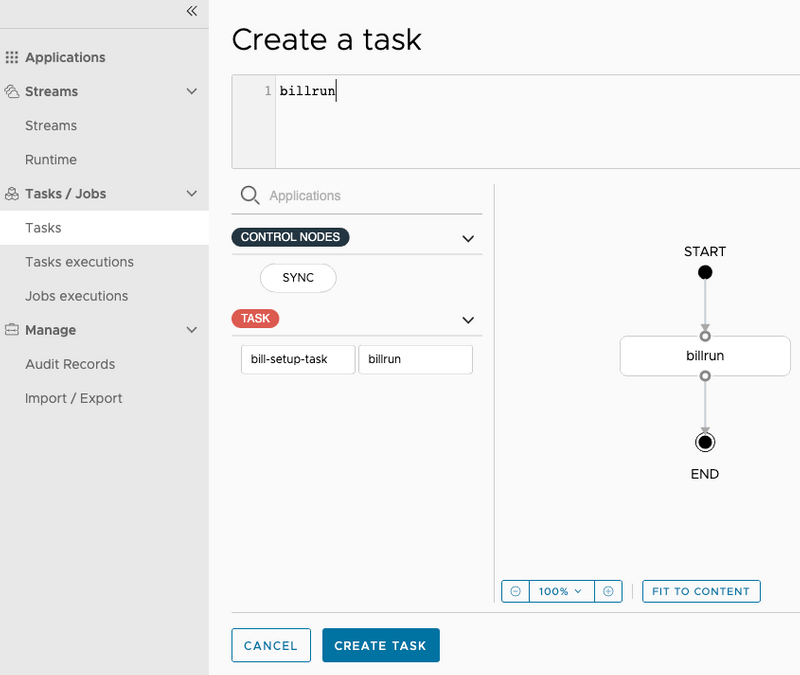
- Click CREATE TASK.
Doing so prompts you to name the task definition, which is the logical name for the runtime configuration we want to deploy.
In this case, we use the same name as the task application, which is
billrun. Now we see the confirmation view, as follows: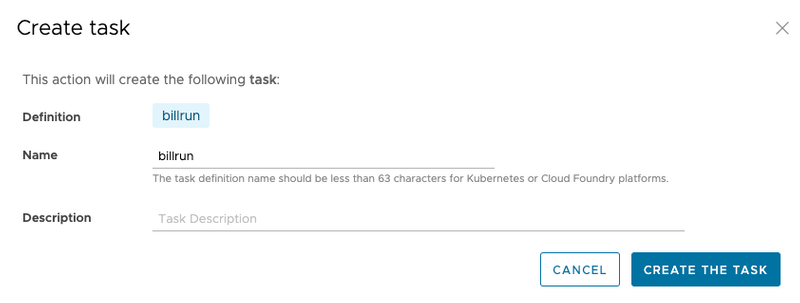
- Click CREATE THE TASK. Doing so displays the main Tasks view.
Launching the Task
The following image shows the Tasks view, from which you can launch a task:

To launch a task:
- Click the option control on the row of task you want to launch and select the Launch option. Doing so takes you to a form where you can add command line arguments and deployment properties, but we do not need any for this task.
- Click Launch the task.
Doing so runs the task on the Data Flow server's task platform and records a new task
execution. When the execution is complete, the Status turns to a green color and showsComplete.Select the Executions tab to view a summary of executions for this task.

Reviewing the Job Execution
Now that we have successfully launched the task, we can check the status of the job that was executed by the application. To view the job executions, click the Job executions tab on the left hand side of the UI. The following image shows the Jobs view:

Now that we can view our job executions, we can dig in to the detail for each job execution. You can do so by clicking the Execution ID link on our job execution, which shows the details of that job execution, as the following image shows:
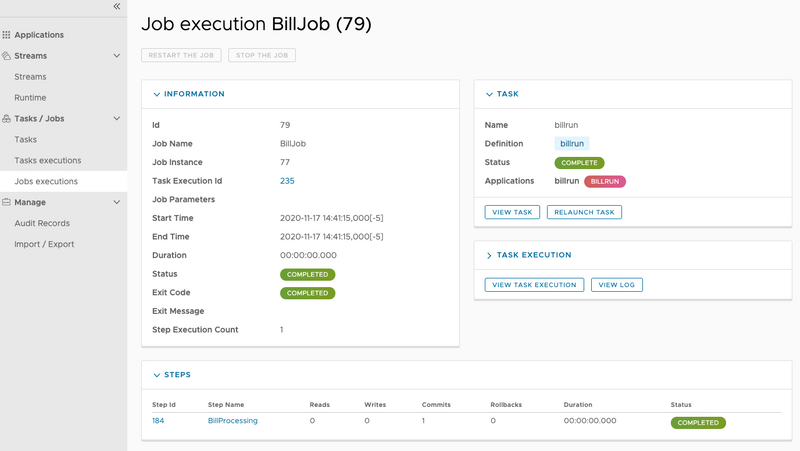
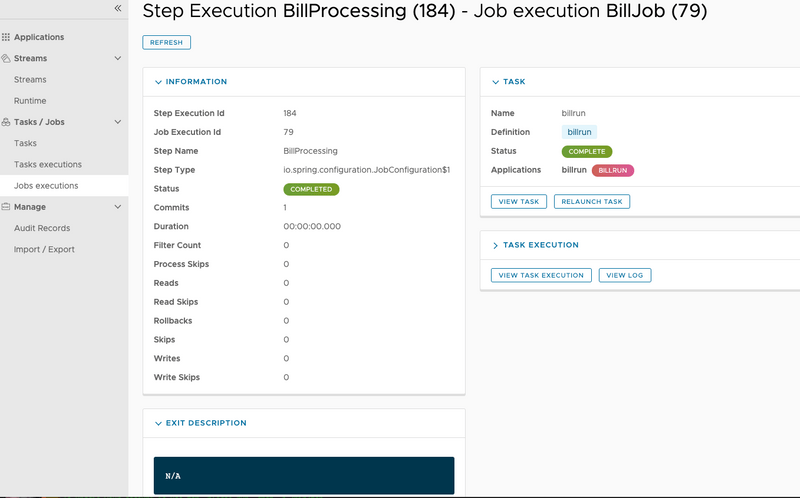
Also, for each job execution, we can view the step detail for each of the steps. You can do so by clicking the name of the step — in our case, it is BillProcessing. The following image shows the step execution view:
